As an Amazon Associate I earn from qualifying purchases. Links below are affiliate links, which means I may earn a commission at no extra cost to you.
Outdoor lights for house exteriors are usually bought one fixture at a time, which is why a finished plan can look piecemeal. A simple framework fixes that: light the roofline first, then the entry, then the landscape, and stop adding zones when the power and control plan no longer makes sense. This article walks through that order using a 100ft RGB+IC eave run with 50 individually controlled LEDs as the backbone. It also sets honest boundaries — where a single run reaches, and what is better left to other fixtures.
Quick answer
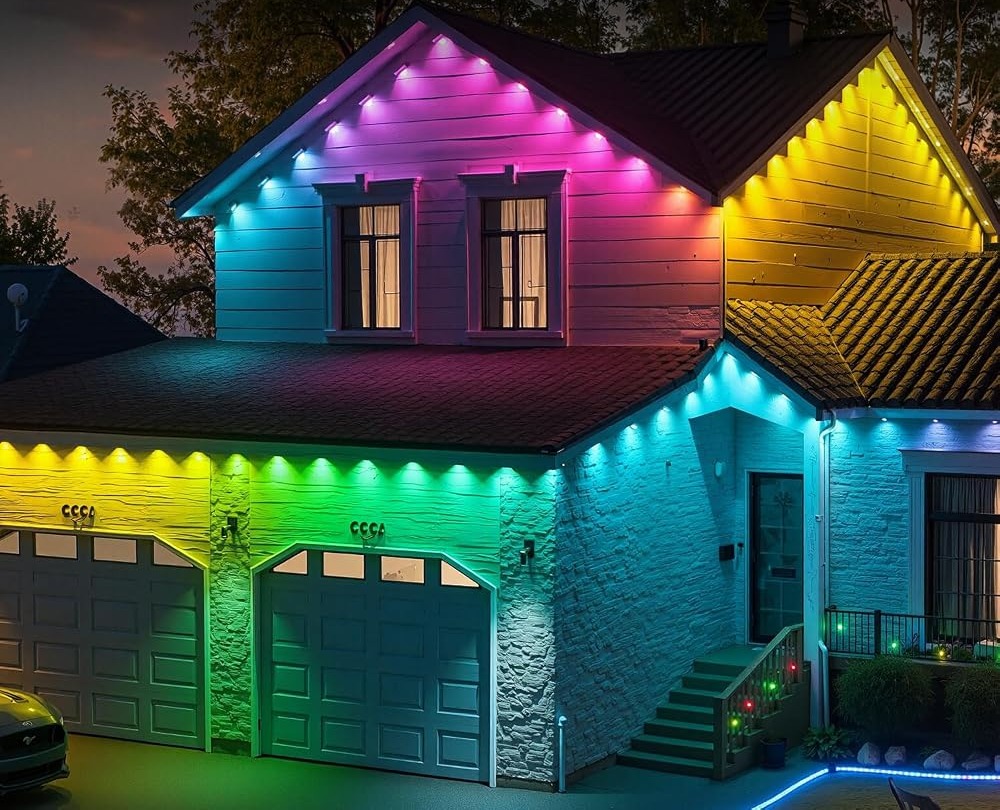
Outdoor lights for house exteriors work best in layers. Start with a continuous roofline run, add the entry and porch, then use other fixtures for paths and landscape. A 100ft RGB+IC set with 50 pixels, 33 scene modes and a built-in timer covers the roofline layer and changes color by occasion. Check the current price on Amazon.
Where outdoor lights for house exteriors fit
A framework saves money and headaches because it decides what not to light. Begin with the most visible edge of the house: the front roofline. It is seen from the street, it reads as one continuous line, and a single run can outline it without multiple power points. That makes the roofline the backbone of the plan.
The second layer is the entry, where a porch or door frame benefits from a defined outline and a welcoming color. The third is landscape — paths, beds, and the boundary between the yard and the sidewalk. Those elements are spread out and rarely suit one continuous strip, so they belong to other fixtures. Thinking in layers keeps a display coherent instead of busy. For the full set of purchase decisions, the permanent outdoor lights buying guide covers the details.
Layer one: the roofline
The roofline is where a 100ft run earns its place. Walk the front edge and measure from corner to corner, then add the returns you want down each side. Soft bends at the corners preserve the strip and keep pixel spacing even; tight folds do neither. Plan the start point near an outlet so the 24V adapter and control box stay close to power.
Color choice at this layer should be restrained. The roofline is a broad stroke visible from the street, so one clean color or a slow two-tone sweep looks better than a fast multi-color chase. Per-pixel control still matters: it is what allows a gentle gradient rather than a hard split. For help turning feet into coverage, see how much coverage a 100ft run gives.
Layer two: entry and porch
The entry is the second layer because it is where visitors look up close. A defined outline around a porch beam or door frame gives the house a sense of arrival, and the app lets you choose a warmer tone here than on the roofline. Because the same run can carry different colors at once, the entry does not have to match the eave exactly.
Keep brightness moderate. A porch outline seen from a few feet away will glare if set to maximum, and light-colored trim shows every hotspot. Start low and raise it until the shape reads clearly. The built-in timer is useful at this layer: run the porch and roofline on the same schedule for simplicity, or set a separate routine if that suits your evenings.

Layer three: where the run reaches its limit
A 100ft run is generous for a front elevation but not for a whole property. Once the roofline and entry are covered, the remaining length is best used on a side return or a garage outline. Paths, garden beds and rear elevations are better served by separate fixtures, because they are spread out and rarely share a mounting plane.
| Zone | Best handled by |
|---|---|
| Front roofline | The 100ft eave run |
| Porch and entry | The same run, different color |
| Garage door frame | Remaining length, if available |
| Walkways | Separate low-level fixtures |
| Rear elevation | Another run or fixture |
Knowing where to stop keeps the install tidy. For the broader set of decisions, the outdoor lighting buying guide sets these zones in context.
What to check before you buy
Outdoor lights for house exteriors work best when the foundation is planned.
- Measure the front roofline and the entry separately.
- Confirm an outlet for the 24V adapter at the start of the run.
- Plan shelter for the rainproof control box.
- Decide which zones the run will cover before you buy.
- Treat IP67 as the seller’s rating and keep the adapter dry.
- Read the 50,000-hour life figure as a listing estimate.
FAQ
Can one 100ft run light the whole house?
Rarely. It is well suited to a front roofline plus short returns and an entry accent. A large property, a long driveway, or a rear elevation needs additional fixtures. Think of the run as the backbone of the exterior plan rather than a complete solution for every zone.
Should the porch match the roofline color?
It does not have to. Per-pixel control lets the run show a warm tone at the entry and a cooler one along the eave at the same time. A slight difference reads as layered lighting; a sharp contrast can look busy. Keep both subtle enough for the street view.
What about lighting walkways and garden beds?
Those zones are better handled by low-level fixtures placed along the path or bed. A roofline strip is mounted high and aimed outward, so it will not wash a walkway evenly. Reserve the eave run for outlines and leave ground-level tasks to purpose-built lights.
Outdoor lights for house exteriors look best when one clean roofline leads the plan and the entry supports it. Measure first, decide the zones, and use other fixtures where the run cannot reach. If the front elevation is your focus, view the 100ft RGB+IC eave lights on Amazon to check the current set.
Views: 0